







Deconstructing JLR All Terrain Progress Control (ATPC)
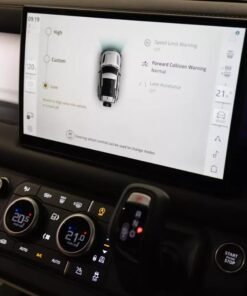
JLR All Terrain Progress Control is an advanced driver-assistance system. Specifically, JLR designed it for low-speed, off-road traversal. In function, it is analogous to a cruise control system for rugged terrain, operating between 1.8 km/h and 30 km/h. Once engaged, the driver selects a speed and the system takes over integrated control of the throttle, transmission, and brakes to maintain that speed, even on steep, slippery, or uneven gradients. This allows the driver to concentrate entirely on steering and vehicle placement.
Technical Foundation and System Dependencies
ATPC is not a standalone system. Instead, it is a sophisticated software function. Specifically, it layers over existing vehicle hardware. Its operation relies on a closed-loop data exchange between several key modules, primarily the Anti-lock Braking System (ABS) module, the Terrain Response control unit, and the Powertrain Control Module (PCM). The system uses data from wheel speed sensors, accelerometers, and gyroscopes to calculate the required torque and braking force for each wheel independently. To perform activation, you write the correct parameter values into the vehicle’s central CCF. You do this via JET in the TOPIx cloud environment.
Hypothetical Step-by-Step Process for ATPC Activation
Disclaimer: This is a generalized procedural overview. Always refer to the official JLR technical documentation for the specific vehicle model and model year.
- Pre-Scan and Preparation: Connect to the vehicle using your DOIP VCI. Perform a full vehicle health scan and document all fault codes. Clear any irrelevant codes. Ensure the battery is connected to a stable power supply.
- JET Session Initiation: Log in to TOPIx with your credentialed account. Navigate to JET and establish a new diagnostic session, selecting the correct vehicle model and VIN.
- CCF Backup: Before any modification, use JET to read and save a complete backup of the vehicle’s current, factory CCF. This is your critical rollback point.
- Configuration Editing: Within the JET CCF editor, navigate to the configuration trees for the relevant modules. Key areas typically include the Terrain Response module (to enable ATPC functionality), the ABS module (to configure low-speed brake intervention), and the Instrument Cluster (to enable the HMI and switch backlighting).
- Parameter Writing: Write the modified CCF blocks back to the vehicle. The tool will validate the data.
- Module Reset and Sleep Cycle: After a successful write, perform a module reset/reboot procedure on the affected ECUs. Following this, place the vehicle into a full sleep cycle by locking it and leaving it for approximately 15 minutes.
- Post-Activation Validation: Wake the vehicle, clear any configuration-related fault codes, and perform a final system test. Verify the ATPC switch is illuminated and that the system can be selected and activated in a safe, appropriate off-road location.
Essential Toolkit for JLR All Terrain Progress Control Programming
Attempting this procedure without the correct equipment will result in failure or, worse, vehicle module damage.
- DOIP VCI: A robust Vehicle Communication Interface that supports Diagnostics over Internet Protocol (DOIP) is non-negotiable for modern JLR vehicles. It ensures the high-speed data transfer required for CCF operations.
- Stable Power Supply: A professional-grade battery maintainer capable of delivering consistent voltage is mandatory. Any voltage drop during CCF writing can corrupt a module.
- JLR Software Access: An active JLR subscription granting access to the TOPIx cloud platform and the JLR Engineering Tool (JET).
- Reliable Hardware: For reliable tools and expert support for complex tasks like this, technicians require professional-grade equipment. We recommend using the dedicated JLR All Terrain Progress Control programming device from TOPIx Cloud, which is specifically designed for this and other advanced JLR retrofit procedures.
Common Challenges and Technical Pitfalls
Even experienced technicians can encounter issues. Here are the most common:
- Configuration Incompatibility: The vehicle’s hardware may not support ATPC. Verify compatibility (e.g., Terrain Response 2, EPB) before beginning.
- Fault Code “Rejected – Configuration Incompatible”: This almost always indicates an incomplete CCF edit. Re-check the configuration of all related modules—often the Instrument Cluster or a secondary body control module is overlooked.
- Module Corruption Post-Write: This is frequently caused by an unstable power source or network connection. Always use a power supply and a wired internet connection for the diagnostic computer.
- Switch Inoperative/No Illumination: This points to a configuration error in the body control module or instrument cluster related to the HMI, rather than the core ATPC logic.
Conclusion
Successfully activating JLR All Terrain Progress Control is a clear demonstration of high-level technical skill in the JLR domain. It requires a meticulous approach, a deep understanding of CCF architecture, and the use of professional-grade tools like a DOIP VCI and the official JET software. By following a rigorous process—comprehensive pre-checks, secure CCF backup, precise editing, and proper post-programming cycles—technicians can reliably deliver this premium functionality to clients, enhancing both vehicle capability and customer satisfaction.
For technicians and workshop owners undertaking complex JLR diagnostic programming and JLR OEM retrofits, having a trusted partner for tools and support is paramount. For more information on specialized hardware and expert guidance, visit jlrupgrades.com.